CARRIDA Camera Client


| Revision: | 2.0 |
|---|---|
| Date: | 2023-07-27 |
| Contact: | support@carrida-technologies.com |
| Copyright: | 2018-2023 CARRIDA Technologies GmbH, Ettlingen, Germany |
| Author: | CARRIDA Support |
1 Introduction
The Camera Client program is a program to discover any present CARRIDA edge device in your network. With this tool it is possible to
- scan the network for cameras,
- update the firmware of all, or a selection of cameras,
- export version information as a CSV formatted text file,
- view the current configuration of all cameras,
- modify the configuration of a selection of cameras,
- manage and create access lists,
- upload classifiers to cameras,
- and reboot or reset any camera.
The main window of the Camera Client is divided into two sections. The left side shows you all detected CARRIDA edge devices, the right half is divided into three separate tabs which provide you the functionality to view, modify and update these devices.

The buttons at the top left of the main window side allow you to either Expand all displayed information about devices, or Collapse the display back to the compact list.
A typical workflow with the Camera Client tools
- first uses the Discovery tab to scan for any existing devices in the network,
- then use the Configure and Update tabs to adjust the devoce settings, or update the devices.
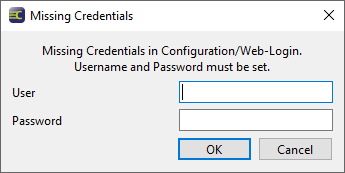
Web-API Credential Dialog
Actions that require the credentials for the Web-API (like the "Specify IP and Scan" action mentioned before) will show a dialog asking for the login credentials. After entering valid login credentials for a device, the chosen action will continue.
Hint
 The configuration of a camera is done via the CARRIDA Cameras´ REST API.
Please consult the documentation of the CARRIDA REST API for more information,
it can be found here: CARRIDA REST API.
The configuration of a camera is done via the CARRIDA Cameras´ REST API.
Please consult the documentation of the CARRIDA REST API for more information,
it can be found here: CARRIDA REST API.
The following Sections describe the functions of the tabs in the right side of the main window.
2 Discovery
2.1 Network Scan
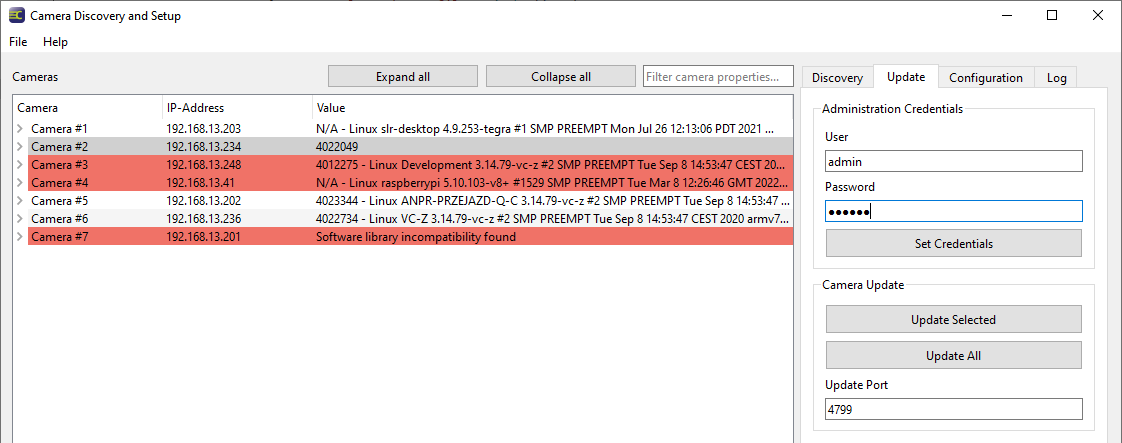
The Scan button in the main window will probe the network for CARRIDA edge devices. After a few seconds all detected CARRIDA edge devices on your network should appear in the list on the left side of the main window, along with some version information.
The Specify IP and Scan button allows you to probe a specific network address or hostname for a CARRIDA device. If the address is valid, the new device will be added to the list of cameras.
Any cameras which can be discovered but do not expose the internal REST API to the outside are marked by a red list entry (see examples above: camera #3,#4, and #7).

The CARRIDA Camera Client works by sending a multicast packet (on IPv4 and IPv6 networks) to all cameras and listening on a certain multicast address to receive an echo from every camera that was reached by the packet. The propagation range of the multicast message can be extended by increasing the TTL (time-to-live) value, the other network scan parameters Multicast Address and Port should not be modified without consulting CARRIDA!
2.2 Defaults
The "Defaults" section allows you to change the scanning network protocol either to IPv4 or the IPv6 protocol. Note that current CARRIDA edge devices use the IPv4 protocol.
2.3 Actions
It is possible to export a list of cameras using the "Export List" button. Here a file needs to be chosen and the application will save it there. Pressing the Clear List button will empty the current list - press the Scan button to create a new list of cameras.
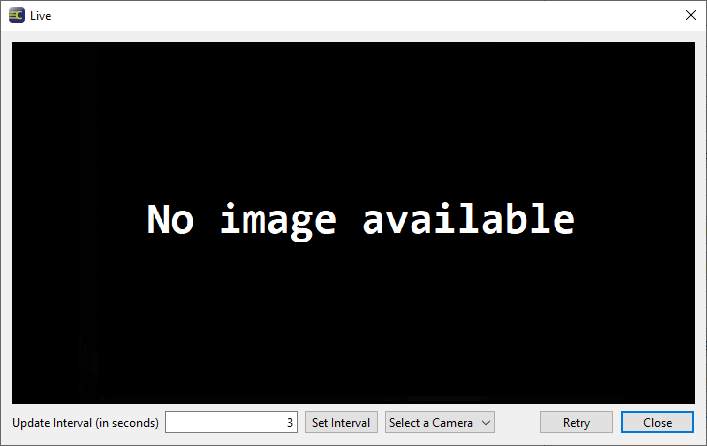
After scanning for cameras, the Live Image button opens a dialog which allows you to fetch and display live images via the camera Web-API. An update interval in seconds can be specified by entering a number into the Update Interval text box and clicking Set Interval.
The Select Camera allows you to choose from the list of the CARRIDA edge devices which have been detected so far.

If an error occurs while fetching the image from the camera, "No image available" is displayed in the dialog window. The image retrieval process can be restarted by pressing the Retry button.
The list of detected cameras can be exported by pressing the Export List button. A CSV formatted file is being written to a user selected location.
The list of detected cameras can be reset (emptied) by pressing the Clear List button.
3 Update Cameras
The Update tab provides you the functionality to push a firmware update to one or more CARRIDA devices.
Note

- The administration credentials for every camera are needed, they they may not necessarily be the same for every camera.
- The Update Port text field should not be modified without consulting CARRIDA.
First, select the cameras which you want to update by ctrl-clicking (hold the CTRL button and click on a list entry) in the list.
Next, if either Update Selected or Update All is clicked, a file dialog will open and a firmware update file needs to be chosen. This file is typically provided by CARRIDA, you need to be able to access it from your PC so that it can be uploaded to the edge device.
A status dialog will appear and show the progress of the update process. After that the field "Update Status" in the camera list on the left side change from this:
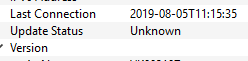
To this:

If something went wrong and the update failed, an error message will be displayed instead of the Update Status field.
4 Configuration
The Configuration Tab allows you to modify parameters on a CARRIDA device. You can view and edit camera parameters of one or more cameras, and update internal lists and classifier engines.
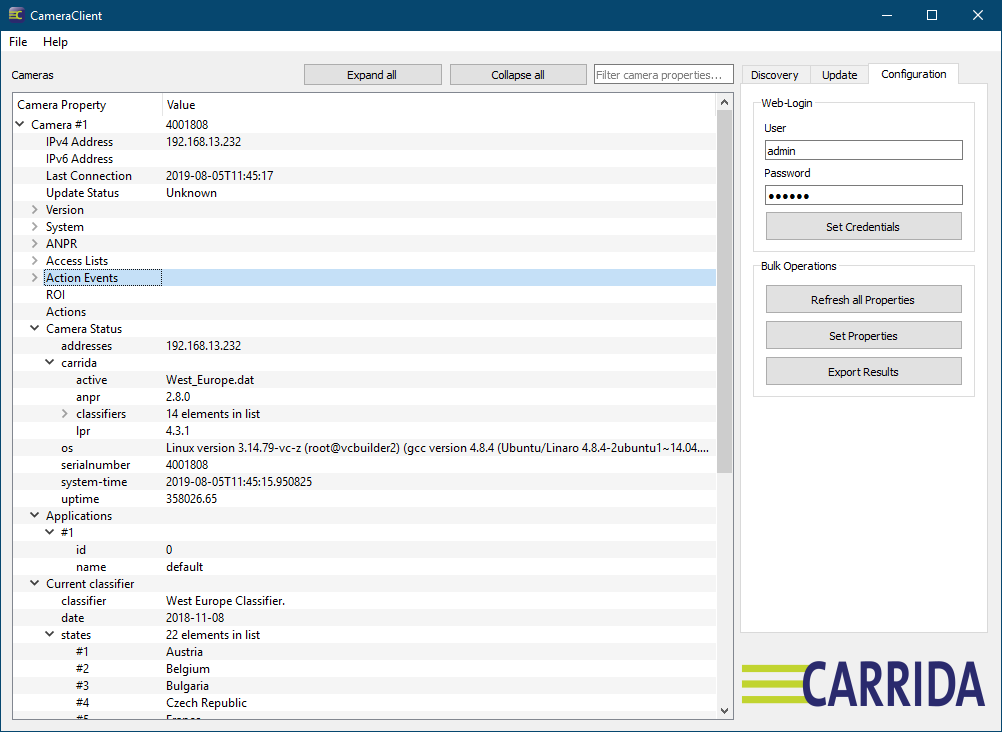
4.1 Web Login
A web login needs to be provided to access the REST API of camera. If the device credentials have been entered, the left side camera property list will be updated and now display the additional information retrieved by the REST API of the device.
5 Bulk Operations
The Bulk Operations section of the main window allows you to modify parameter sets of one or more cameras.
5.1 Refresh all Properties
The information retrieved from all cameras can be refreshed by clicking the Refresh all Properties button. The foldable list of all cameras and their parameters on the left side of the main screen will be updated.
5.2 Export Results
Pressing the Export Results button saves the settings of all cameras to a folder of your choice in the form of a CSV formatted file.
5.3 Set Properties
By clicking the Set Properties button, a new Configuration window opens, it allows you to fully modify the parameters of one or more CARRIDA edge devices.
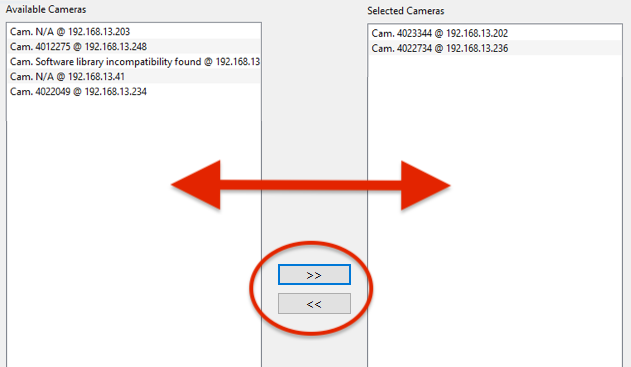
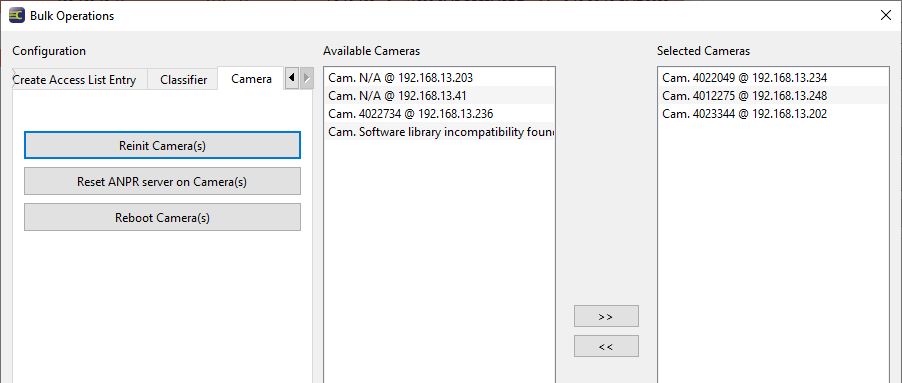
First, select cameras by moving them from the Available Cameras list on the left to the Selected Cameras list views on the right.
The >> and << button respectively moves a camera back and forth the lists. Only cameras which show up in the Selected Cameras list will be affected by configuration and property changes.
5.4 System and ANPR settings
The two tabs System and ANPR expose the associated parameter sets of the cameras. All available camera parameters are listed in the table below the tabs. For example the three system properties dhcp, ntp, and time are listed in the table beneath the System tab.
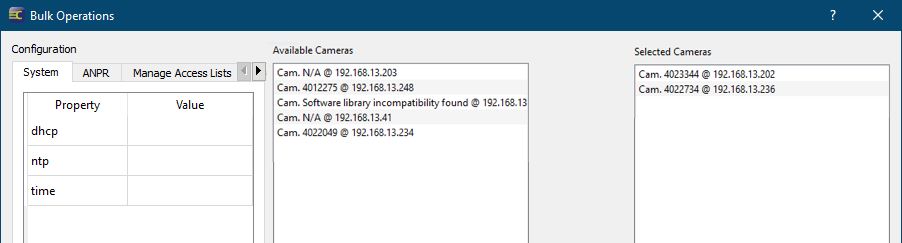
The value fields are empty by default - to modify a camera parameter, enter a value and push the new value to the camera(s), by pressing the Push to Camera(s) button. A parameter field which is not filled with a value will not be sent to the camera.
Press the Clear AllParameters button to empty all parameter fields in the current table.
5.5 Manage Access Lists
This tab allows you to modify access lists on cameras. Lists can be up- and downloaded, and individual list entries can be deleted on all selected cameras.

Select the desired list type on the camera(s) with the pull down dialog Selected access list.
To upload a new list to cameras, first select a list by pressing the Select a list (...) button. Then press the Push list to camera(s) button. All selected cameras will receive the new list.
To download a list from cameras, press the Download lists from cameras button. You will be presented with a dialog to choose the destination name and location. A list file for each selected camera is then created and stored on your PC. Before you download the access lists, you will be presented with a dialog which asks you for the filename of the access lists under which they are to be stored. You can provide a basename and add some templates, which are filled dynamically with values during the storage operation. Using the templates allows you to create per camera unique file names.
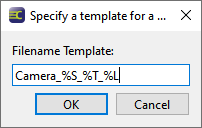
Filename Templates Template Will be replaced by %T The current time %S The camera's serial number %L The name of the list
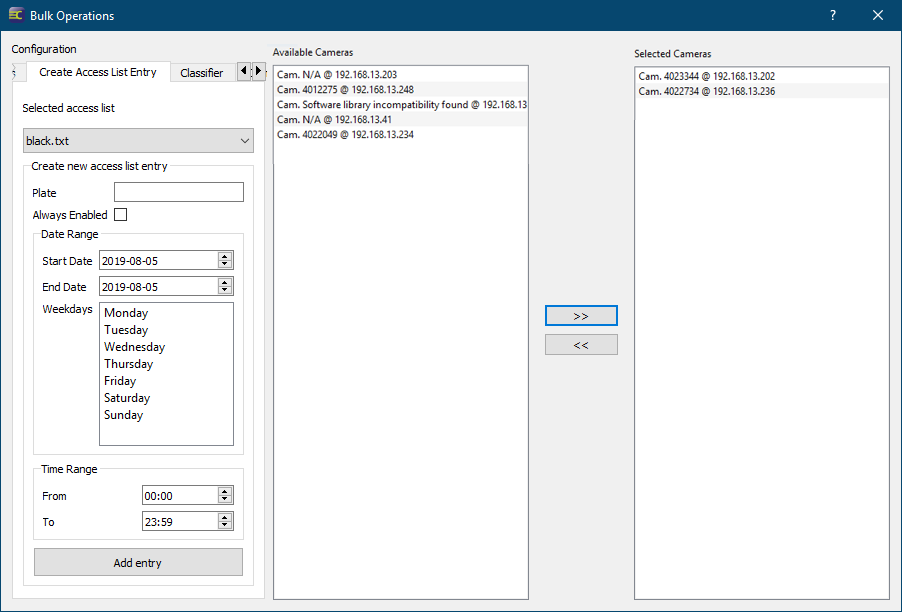
5.6 Create Access List Entry
The Create Access List Entry allows you to modify an access list on the camera. Add a new license plate number by entering a string in the Plate text box and optionally creating a schedule.
Hint
If the license plate entry should apply wihtout time and date restrictions,
mark the Always Enabled check box.
A schedule can be defined by specifing a date and time range, as well as a list of weekdays. The weekdays can be marked by clicking and holding the control key.
To complete the entry, press the Add entry button.
Note
Pressing the Add Entry button pushes the list update immediately to all selected cameras.
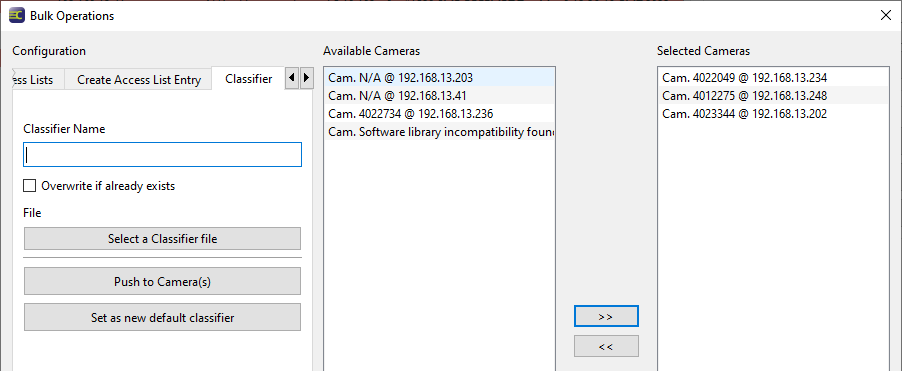
5.7 Classifier
The Classifier tab is used to update classifier files on one or more cameras.
The Classifier Name text box shows the currently chosen name for the classifier which is to be used for the two possible operations update and make default, as described in the following paragraphs. When you load a classifier from your PC, the text box will be set to this classifier name, you do not need to enter it manually.
Update a classifier on the edge device
Select a new classifier file (which is usually provided by CARRIDA), by pressing the Select a classifier file button. The classifier is now loaded from your PC, also the Classifier Name text box is updated with the name of the selected classifier file. As mentioned above you can change the name now if you decide to do so.
The Push Classifier to camera(s) button starts the upload of the chosen classifier to all selected cameras.
If the Overwrite if already exists check box is marked, the uploaded file will replace a classifier on the camera with the same name.
Set a classifier as default on the edge device
The button Set as new default classifier sets the classifier as specified in the Classifier Name text box above on all selected cameras as new default. If you try to make a classifier which can not be located on the camera as default, an error message will be received.
6 Log
In case of a warning or an error, an entry to the log is added.
The log can be saved to a text file by clicking Save Log. With Clear Log, the log can be emptied.

7 Useful links and further information
| CARRIDA REST API | Documentation of the CARRIDA camera REST API |
| CSV | Decription of the CSV data format |
| TTL | General Documentation of the Time To Live network parameter |