CARRIDA Quick Installation Guide


| Revision: | 2.1 |
|---|---|
| Date: | 2024-03-06 |
| Contact: | support@carrida-technologies.com |
| Copyright: | 1996-2023 CARRIDA Technologies GmbH, Ettlingen, Germany |
| Author: | CARRIDA Technologies |
Mounting the camera
The camera should be mounted and stabilized on a place which is least 2 meters away from the closest position where the vehicle is expected, although closer distances can work.
The CARRIDA Edge device is equipped with a 8 mm lens by default, the resulting horizontal field of view is suitable for most access control applications. The following table shows the field of view depending on the camera lens type and the distance of the vehicle from the camera.
| The field of view for different lens configurations | |||
|---|---|---|---|
| Distance | 8 mm Lens | 12 mm lens | 16mm lens |
| 2 m | 1.25 m | ||
| 4 m | 2.50 m | 1.67 m | 1.25 m |
| 6 m | 3.75 m | 2.50 m | 1.88 m |
| 8 m | 5.00 m | 3.34 m | 2.50 m |
| 10 m | 4.17 m | 3.13 m | |
| 12 m | 5.00 m | 3.75 m | |
| 14 m | 5.84 m | 4.38 m | |
| 16 m | 6.67 m | 5.00 m | |
| 18 m | 5.63 m | ||
| 20 m | 6.25 m | ||
It is important to consider both the mounting height and angle of the camera. If the camera is placed too high, or the horizontal/vertical angle is too big, the recognition accuracy may be reduced.
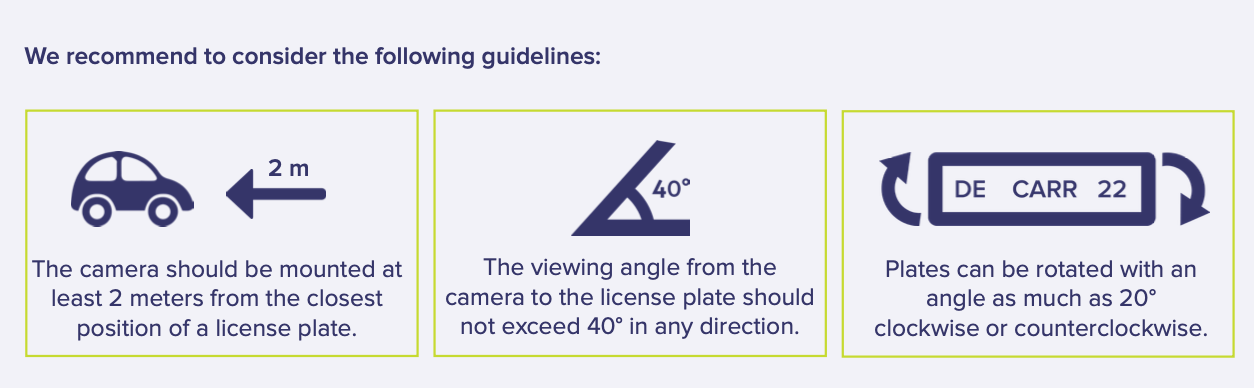
- We recommend to consider the following guidelines:
- The camera should be mounted at least 2 meters from the closest position of a license plate.
- The viewing angle from the camera to the license plate should not exceed 40° in any direction.
- Plates can be rotated with an angle as much as 20° clockwise or counterclockwise.
Connecting the camera
After mounting the camera, attach the power and the LAN cable using the connectors J0 and J1 on the camera.
| Camera Socket Rear View | Pin | Signal | Level | Cable Standard Color |
|---|---|---|---|---|
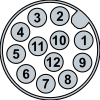 |
1 | Main Power Supply | +24 V | brown |
| 2 | Common Ground | GND | blue | |
Electrical Specification: Camera Power Supply
| Nominal Voltage | 24 V |
| Nominal Power Consumption | 7.5 W |
The camera is configured to use DHCP as factory default, your local network needs to provide a DHCP server so that the camera can be assigned an IP address.
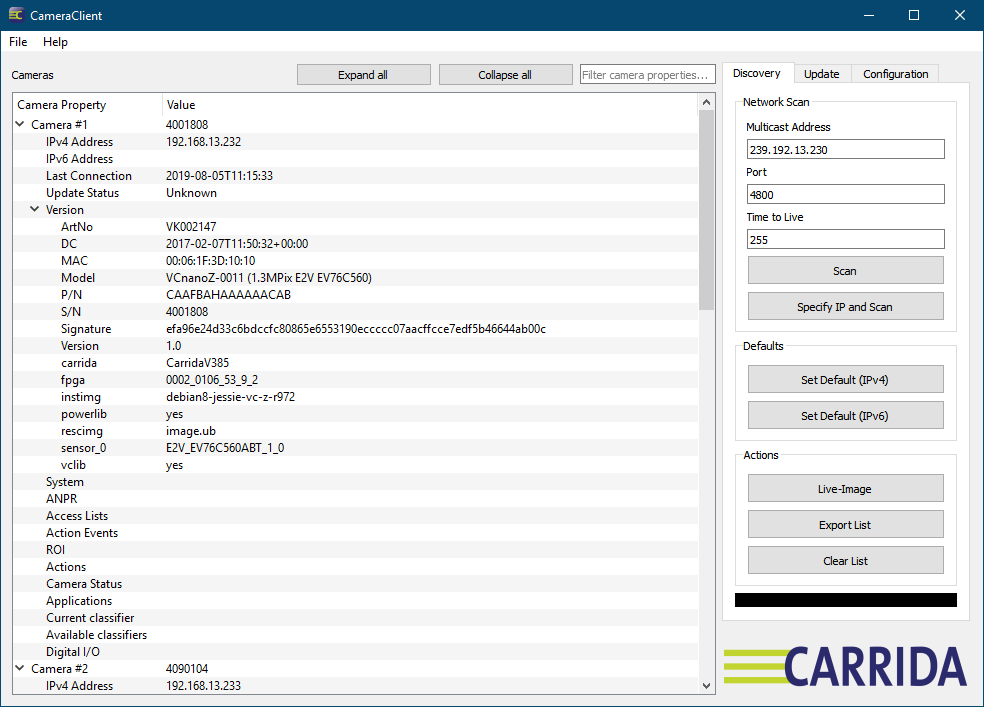
After powering up the camera, the simplest way to detect it in your local network is to start the CARRIDA Camera Client Tool for Windows. You can download it from here
https://carrida-technologies.com/download/tools/setup-cameraclient-1.0.0.zip
If you are running Linux, or you do not want to download the CameraClient Tool, you can scan your local network and check for the camera directly. For example on Mac OS you can use the free LanScan tool, or you can use the arp command on Mac Os, Linux, and Windows like:
arp -a
to detect all devices in your network. All Cameras are created by the manufacturer Vision Components and they have assigned a MAC address which starts with 00:6c:1f:.
(192.168.13.234) at 0:6:1f:0:0:0 on en0 ifscope [ethernet]
(192.168.13.235) at 0:6:1f:3d:c:5b on en0 ifscope [ethernet]
(192.168.13.236) at 0:6:1f:3d:61:ce on en0 ifscope [ethernet]
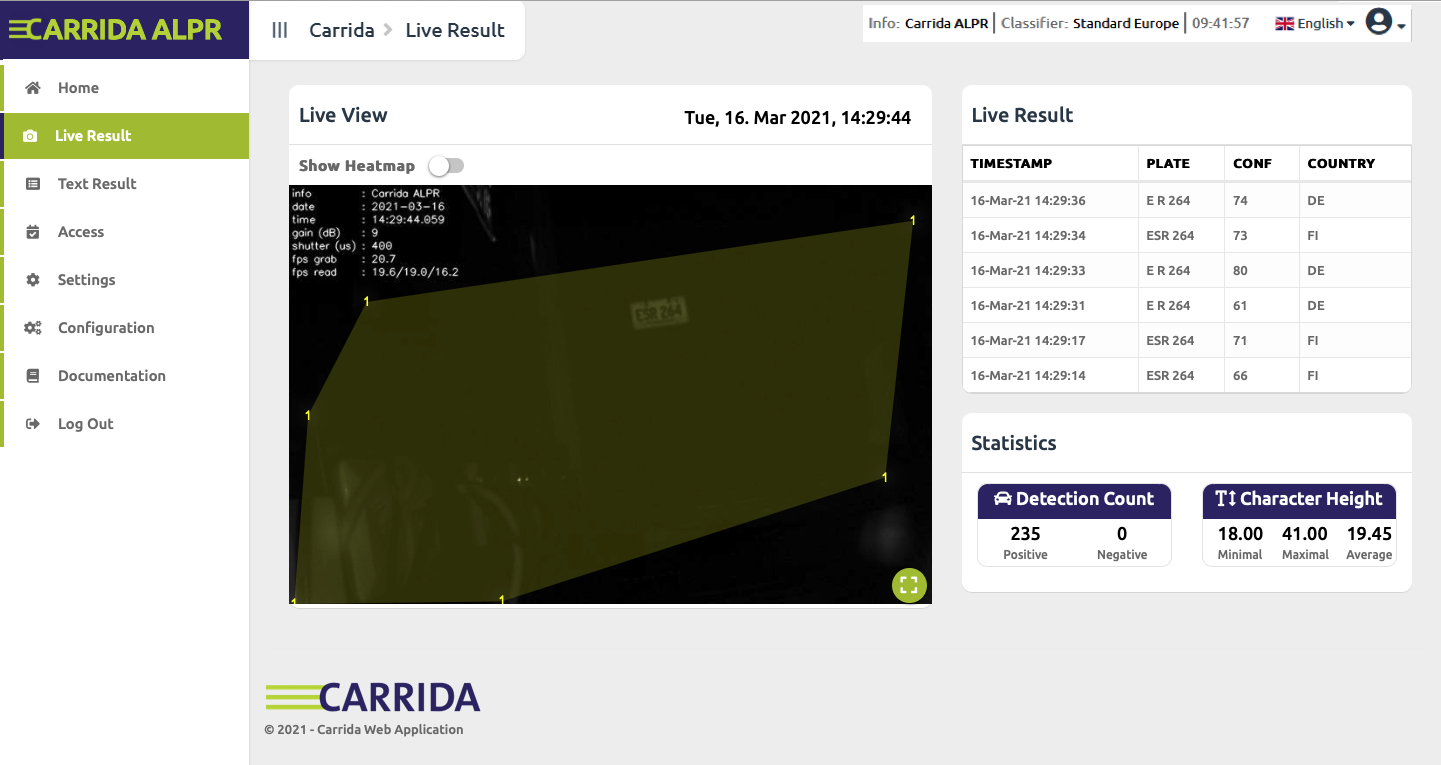
Setting up the camera
Once you have detected the camera's IP address, you can start to set it up properly. Open a browser and login to the camera using its IP address. Preferrable use adminstrator credentials the first time you log in to the camera:
user name: admin
password: secret.
Note

We strongly recommend to change the admin password in this first session!